
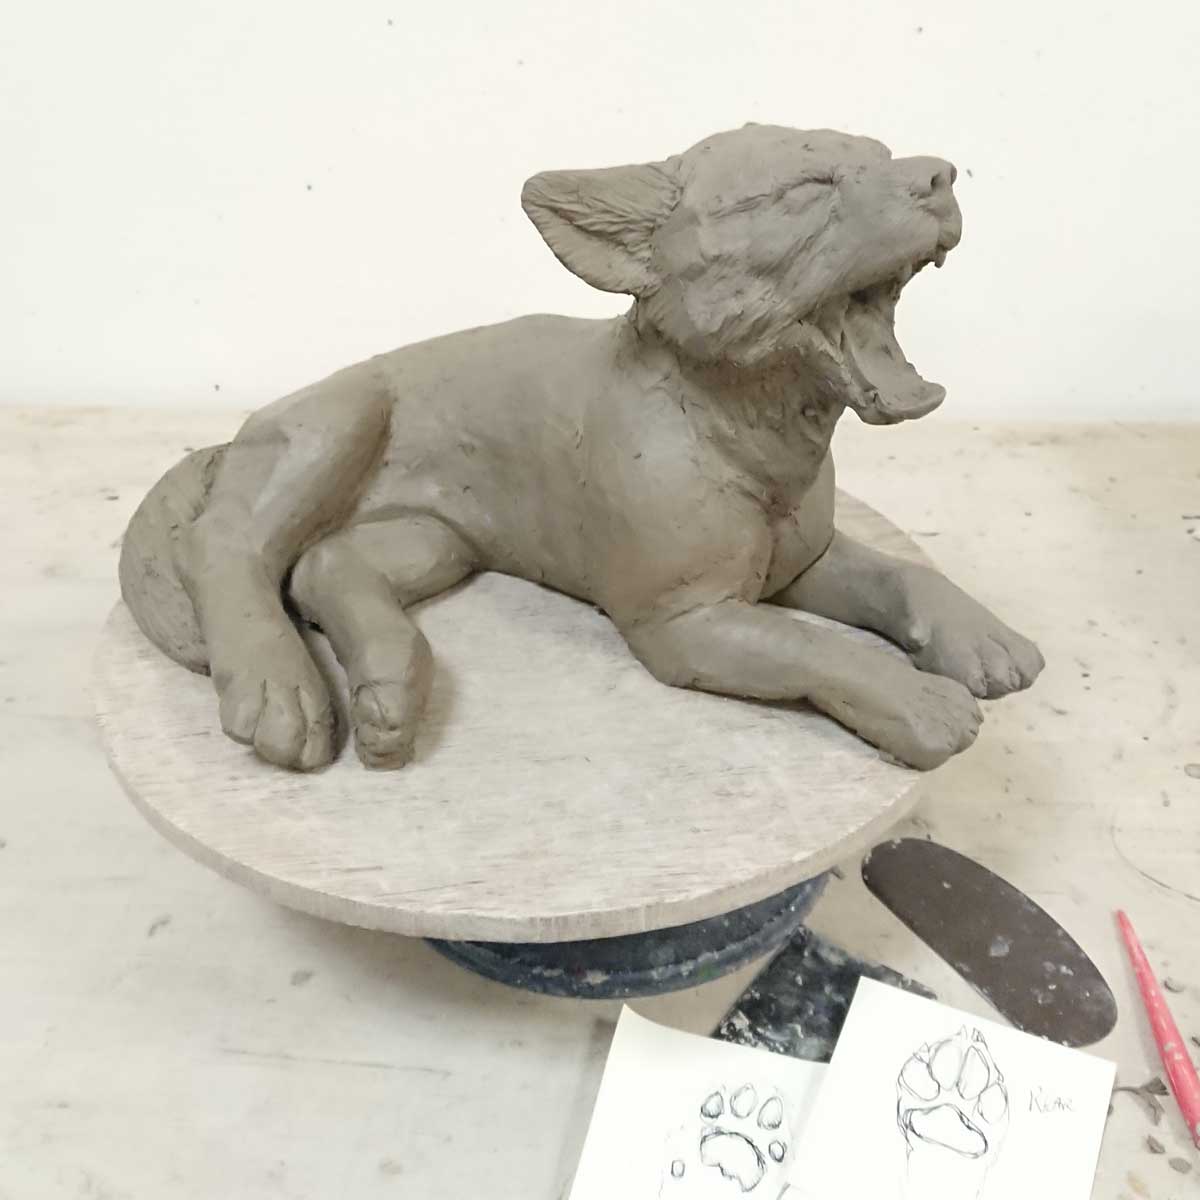
Preparing a Wolf Cub for casting in Plaster.
Here we have a nearly finished sculpture of a wolf cub made during the lock down in 2021. I had been aiming to get this pair of cubs made for some length of time so finally had an opportunity. The initial sculpture is made using Buff clay supplied by Kettles Pottery Supplies based in Edinburgh. In order to cast clay sculptures you need to make a mold in plaster, for this I use HP2 Plaster . This is a very hard plaster when set commonly used in dental casting.
Removing the front legs.
I cast sculptures in plaster to create press molds for my limited edition pieces. Plaster once set and dried absorbs water from the clay you press into it. This in turn makes the clay shrink slightly as it dries and allows it to release easily. However plaster is very solid so if you had any parts on your sculpture that would catch in the mold, known as undercuts, your piece would be damaged. To avoid this I take sculptures apart so I can make 2 or 3 piece molds of each part. Here I remove both the front legs initially.


Removing the upper back leg.
The body of the wolf will eventually be a 2 part mold so I have to remove anything that would catch. Here I detach the upper back leg trying to ensure a clean cut so reassembling the sculpture later will be easy. It has to be seperate from the main thigh as these two portions of the wolf are cast along different axis. This allows me to keep all the paw print detailing and toes.
Detaching the thigh.
In order for the body to come apart in 2 sections I then have to remove the thigh so it will not catch. The initial sculpture is created solid but once cast the whole piece will be hollow.


Removing the lower back leg
This is the final part of the rear of the wolf that needs to be removed. As with the upper back leg this piece needs to be cast down a central line that allows the paw prints and toes to release from the mold.
Removing the head and neck
I can now remove the last piece that would hinder casting the body which is the head and neck. The remaining part of the body can be cast in two sections around a horizontal line about the body.


Seperating the neck and head
The head and neck presented their own problems for casting. It was necessary to make the neck a seperate piece so that parts of it would not catch in the mold.
Taking the head apart
It took quite a while to figure out how I would cast the head. I finally opted to cut it into three sections, the lower jaw, the bridge of the mouth with teeth and lastly the face and ears.

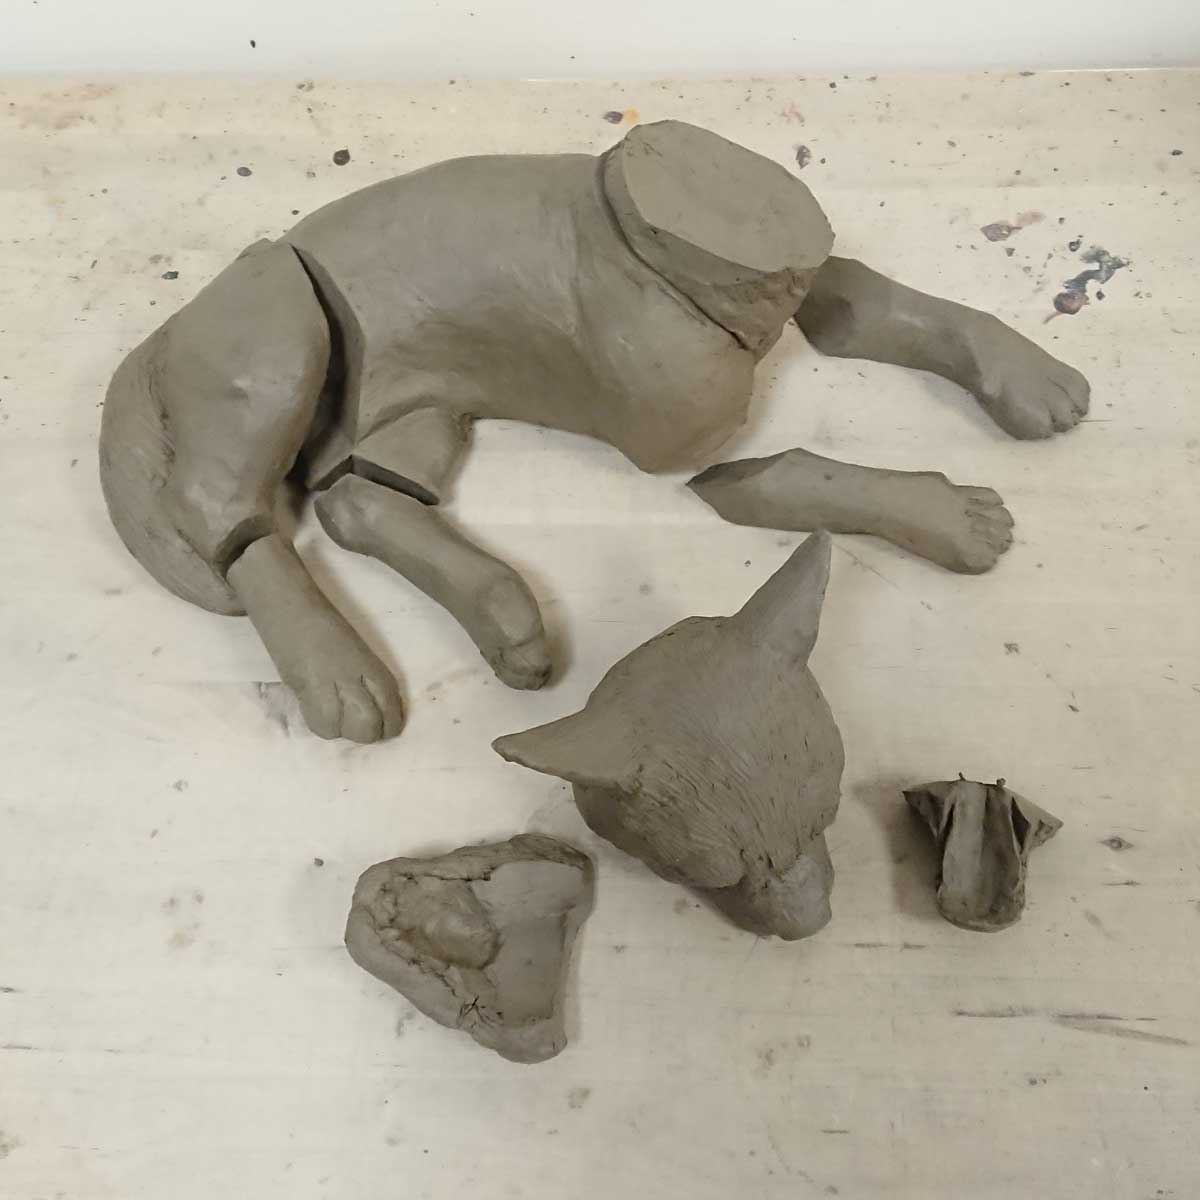
The final parts.
Altogether the Wolf Cub consisted of 10 parts as pictured. Each of these parts is now made into a two piece mold. To do this each part is embedded into soft clay to a midpoint. Plywood boards are used to make container walls, soft soap is applied to the clay to make the plaster release easily. The casting plaster is then poured in. The liquid plaster is agitated with my fingers to ease it in to any crevices followed by the mold being gently vibrated to bring air bubbles to the surface. In about 30minutes the plaster has set , the mold is flipped over and the soft clay removed leaving just the parts of the wolf cub emerging. Soft soap (I use fairy liquid) is applied as a releasing agent before the second part of the mold is poured to ensure the two halves dont stick together.
The finished piece.
Plaster molds take roughly 2-3weeks to thoroughly dry out. I can then line the molds by pressing clay into them to a thickness of just under 1cm and press the 2 parts of the mold firmly together. The clay parts are removed from the mold about 30minutes later. Each part has the seam lines fettled away, fur texture modelled in and is then joined together with the body. All the joins are carefully sculpted over to create the finished wolf cub.
The Wolf Cub is dried thoroughly and put in a kiln to 1145c for a high bisque firing. This makes the clay very dense but still slightly porous which allows me to finish the piece in acrylic paints. This is one of a limited edition of 100 that will be made from the mold and when the edition is complete, the molds are broken up. If you would like to order one these Wolf Cubs are available through the gallery online shop.
